Over the past few years, I’ve taken an interest in hydroponic gardening. Now, because I live in Washington state, and because trees aren’t the only popular leafy green here, I need to be clear: I’m talking about growing vegetables. You want to farm the devil’s lettuce and induce reefer madness? That’s your business, not mine.
That said, what follows will be very similar regardless of what you decide to grow.
My hydroponics journey started with an Aerogarden. But you have to understand something – I’m not made of money, so this particular aerogarden came from a garage sale and when I got it home, I discovered a very unpleasant fact:
The aerogarden did not use any nutrients in the water. So whoever owned this aerogarden decided to enhance it by pouring fertilizer into the water tank.
The result smelled like liquefied crap, and it took days of soaking outside to reduce the smell to the point where my wife would allow it inside.
But…it worked.
We grew stunted lettuce, and stunted herbs, and stunted tomatoes. And despite the negative rap Aerogarden gets sometimes, it actually worked. Now, these days, you use plant food with your aerogarden, which probably helps get better food.
But the aerogarden isn’t that tall, and many vegetables (I’m looking at you, broccoli) often outgrow it. Also, the tank volume is not huge, and plants with large root networks often wind up emeshed, meaning removing a dying or dead plant is a pain.
But we moved on.
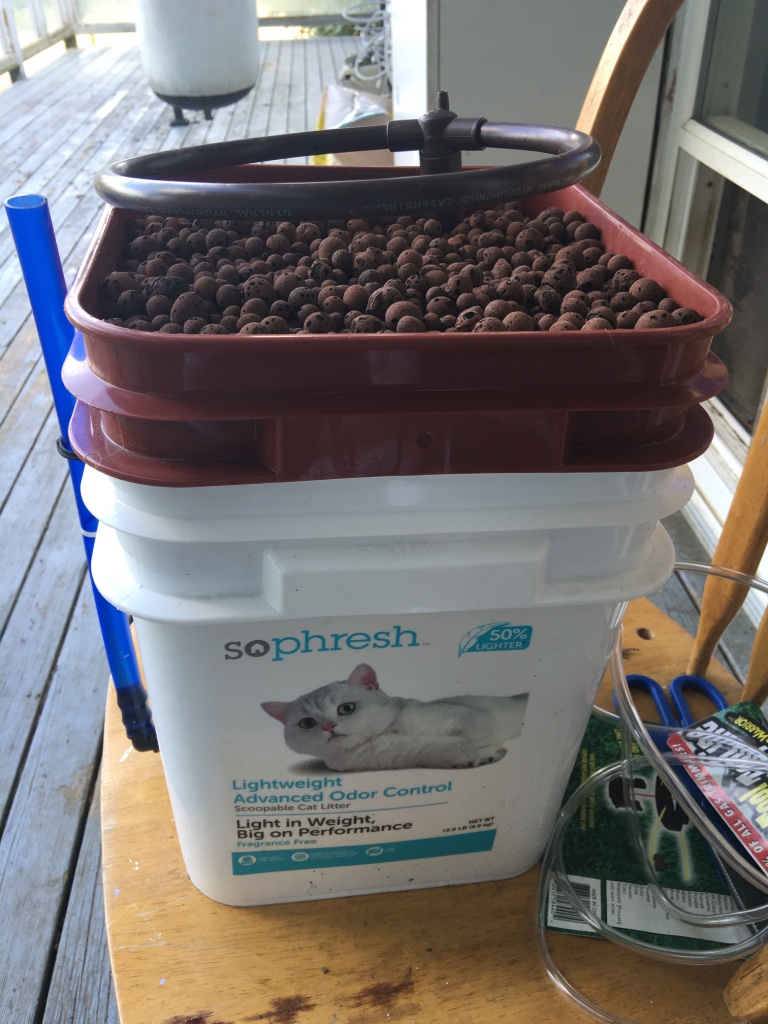
This time, I decided I’d plunk down the $50 and get a “proper” water garden. The one I settled on was simple, easy to maintain, and had decent reviews – the General Hydroponics Water Farm. For those of you who haven’t seen it, it’s basically a small cat-litter bucket and a large cat litter bucket. The small one has holes drilled in and is filled with clay pebbles which give the roots something to anchor to. A drip ring pulls water from the bottom reservoir and dribbles it over the media (and the plant roots). All of this is driven by a fish aquarium pump.

And with the water farm, we found real success—but the reason why is a reason so many people shrug and throw up their hands.
Waterfarm uses a three part nutrient solution you mix together, and it comes with all sorts of warnings about how if you mix it together it will form a precipitate and not feed the plants at all. It comes with warnings about “lockout” (nutrients wrong) and root shock and temperature, and piles and piles of charts which list by plant type and week what you should be mixing.
And you can do that. People do. They are wildly successful.
But I’ve had a great deal of success using the basic nutrient mixture through the entire lifecycle. Odds are if I did it the hard way I’d get way better results, and some day I may build an automatic measure and mixer controlled by an Arduino and some relays…but not yet.
When it comes to nutrients, I’m reminded of an old beekeeping saying: “Everything works if you let it.” Which doesn’t mean every combination of nutrients would work, but people who insist that you are killing your plant by not using the week by week nutrient to milliliter guide are lying to you.
Right now, every Sunday, I drain the water (and use it on my soil garden), then refill with nice clean water and fresh nutrients. During the week I top it off with clean water.
And that’s it…or at least, it was. See, I wanted more waterfarms, but I didn’t want to pay the price tag. That’s when it occurred to me that I had many of the materials already.
You see, my daughters own cats. And cats never stop using the litter box, ever. These cats practically use it in their sleep. So I’d accumulated a number of plastic bins which were the same rough dimensions as the water farm reservoir. That’s when I discovered that you could order the “plumbing kit” and use your own reservoirs. The plumbing kit is all the parts I didn’t want to build on my own:
The drip ring, the drain/water guage, the grommet.
I ordered two for less than one Waterfarm, and used my own buckets, producing LitterFarm 1.0 and 2.0. I was using a plastic T-splitter to overwork a single pitiful air pump, but found cheap (used) air pumps from various sources.
This winter, I’ll move the whole setup to my basement and keep it going despite the cold and rain. I have a grow-light setup downstairs, and I’ll do new veggies through the winter.
I’m sure that I’m on some Federal watchlist on my purchases alone. Grow light. Waterfarm. Nutrients. Combine that with the fact that the college students down the hill used to throw their seeds in the back yard after spending some time stoned, and I’m sure I fit the profile for “smallest-time drug dealer ever.”
For us, it’s the fresh broccoli, Brussel sprouts, and cauliflower. We’re going to try corn next. Tomatoes didn’t do well for us, but that could be me making mistakes.
One other thing I have done that I probably won’t repeat: One of our drip rings got lost over the winter, and I ordered a plumbing kit to replace it. So I had spare pieces, and decided to make my own from scratch, meaning using a 5 gallon bucket as the reservoir and a 2.5 gallon bucket as the media chamber. This meant building my own drip-ring, which isn’t terribly difficult – if you’ve seen an aquarium floore filter, it’s the same concept.
But don’t.
The amount of time and work I put into building a marginally functional drip-ring wasn’t near worth what I saved.
I will be building a flood and drain system for next year myself, but that’s another blog post.
So, in summary: Hydroponics are easy to start with. The instructions are impressive and can scare you off. It’s worth working your way through and learning. Oh, and online you’ll find a great community to help. Though many of them may be growing a different crop than me, I’ve certainly harvested a ton of wisdom.
Good Luck!
Thank you for giving the info. It will help me bunch.